Have you ever had to sign a group card for someone in the workplace?
Perhaps Anne is retiring from the office after 40 years of employment, or Connor is getting married, or Jenny just had a baby. You know the drill, a leaving card, retirement card or new baby card gets passed around the group and everyone claims a tiny space to write a little message and sign their name.
But what if you need more space to write inside a card? What happens when Alex takes up more than their fair share of the card with their massive handwriting and doesn't leave enough space for everyone else?
It's ok, we've come up with a clever solution. In this article we'll guide you through how to add extra sheets of paper to a group card to give you loads more space to write on. Essentially, this is a guide on how to make a card bigger. It's our number one frequently asked question, by miles.
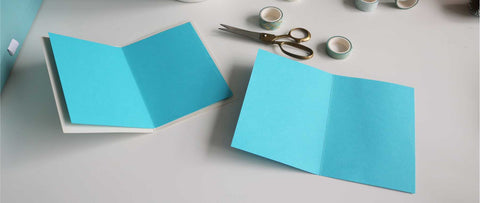
All you need is some tape, scissors and a piece of paper the same size as the inside of the card.
Here's what you do:
Step 1- Grab a piece of paper the same size as the inside of the card. We're assuming you've got a card like ours with a paper insert inside, but if there is no insert, you can still do this and attach the extra sheet to the edge of the card. If you haven't yet ordered from us and know this is what you want to do, ask us nicely when you place your order and we'll send you an extra insert sheet in the right colour for free. (Side note, flattery, charm, social media shares and biscuits are not essential but are all welcome and appreciated!)
Fold the sheet of paper in half so it can sit inside your card and fit perfectly.

Step 2- Line the paper up with the insert (as shown above)
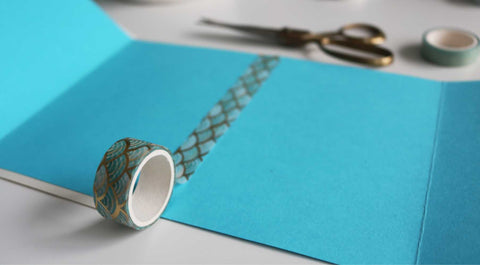
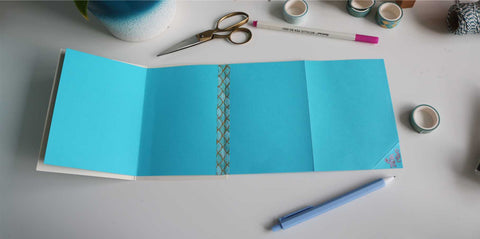
Step 3- Take some tape. We've used a fancy washi tape because it looks nice and comes in many colours and patterns. This one was from a local craft store, but you can pick them up online or through most stationery suppliers. Normal tape works too, it just doesn't look as fun. Tape the two sheets together, making sure that the paper and the inside of the card are almost touching, but not overlapping. Cut the tape and fold the edges over to the back in needed.
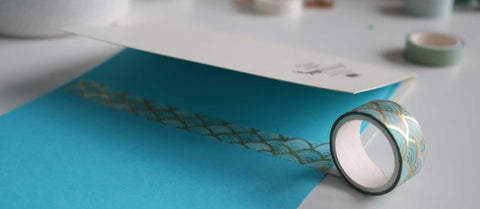
Step 4- Turn the card over and tape along the join on the back. This step can be a bit fiddly because of the back of the card being in the way so take your time.
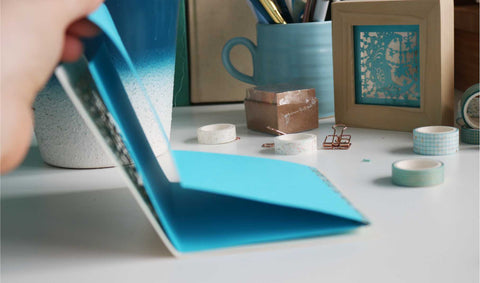
Step 5- Turn the greetings card back the right way, fold along the new tape hinge and put the extra insert inside the original insert. You now have 6 (count them, SIX!) sides of paper to write messages on, whereas you previously only had 2! You're welcome!
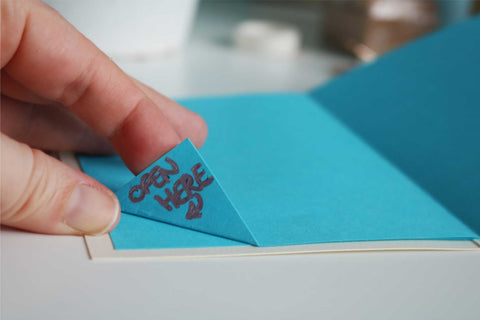
Optional Step 6- Make a small fold in one of the corners and add "Open here" or similar if you think the recipient might not realise the card opens all the way out.
And if that's still not enough space (maybe you work with 765 fellow employees and the recipient is REALLY popular...) you could always repeat this step again and add another sheet of paper to this.
0 comments